Home
Here I am building a sample Android App using Retrofit and MVVM Architecture
Model — View — ViewModel (MVVM) is the industry-recognized software architecture pattern that overcomes all drawbacks of MVP and MVC design patterns. MVVM suggests separating the data presentation logic(Views or UI) from the core business logic part of the application.
The separate code layers of MVVM are:
Model: This layer is responsible for the abstraction of the data sources. Model and ViewModel work together to get and save the data. View: The purpose of this layer is to inform the ViewModel about the user’s action. This layer observes the ViewModel and does not contain any kind of application logic. **ViewModel: **It exposes those data streams which are relevant to the View. Moreover, it serves as a link between the Model and the View.
To build this application, we need MVVM architecture and Retrofit Library. Retrofit is a third-party library that helps us to make a network request in android. We will fetch data from the movie API https://www.howtodoandroid.com/movielist.json
Steps:
- Create a new project in Android Studio(Use kotlin language)
- Add Retrofit dependencies(For network call) in build.gradle file(App level)
implementation 'com.google.code.gson:gson:2.9.1'
implementation 'com.squareup.retrofit2:retrofit:2.9.0'
implementation 'com.squareup.retrofit2:converter-gson:2.9.0'
- Add view model and live data dependencies in build.gradle file(App level)
implementation "androidx.lifecycle:lifecycle-viewmodel-ktx:2.5.1"
- Enable view binding
buildFeatures {
viewBinding = true
}
- Add internet permissions in the Manifest file
<uses-permission android:name="android.permission.INTERNET"/>
-
Setup the Data layer: In the data layer, we have to prepare the model for the data, and an API call needs to be implemented.
-
For the response data, First, we need to create a model class.

-
First, create the interface for the API call definition.
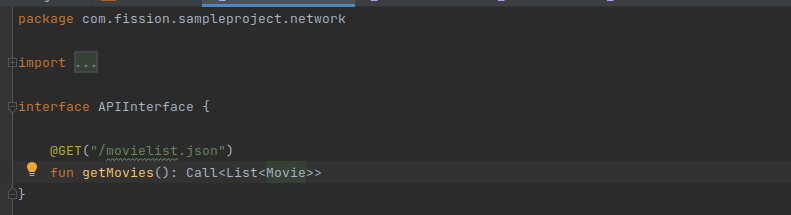
-
Next, Create the Retrofit service instance using the retrofit.
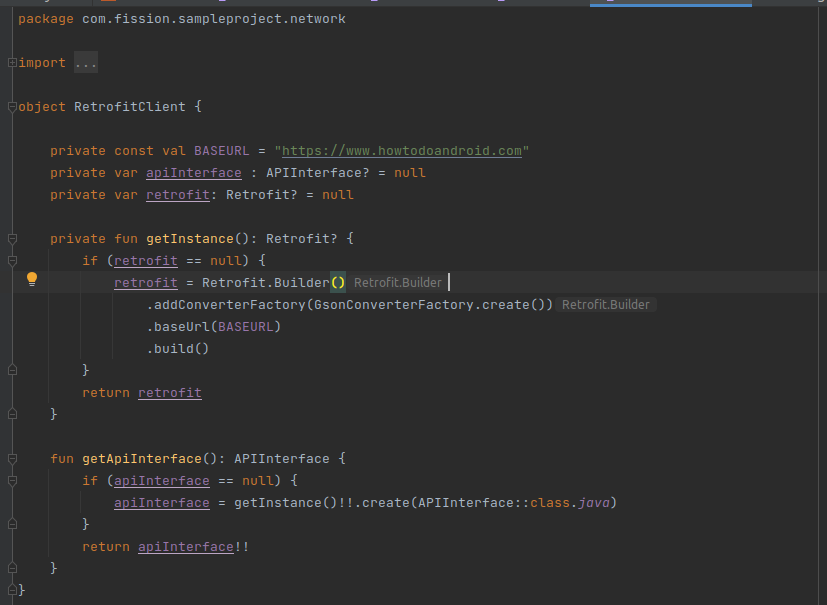
-
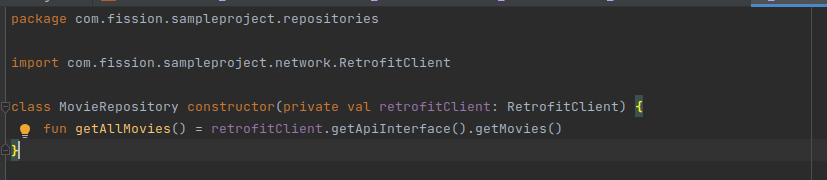
Setup Data Repository: I am using a repository pattern to handle the data from API. In the repository class, we need to pass the retrofit service instance to perform the network call. We don’t need to handle the response here in the repository. That will be part of the ViewModel.
-
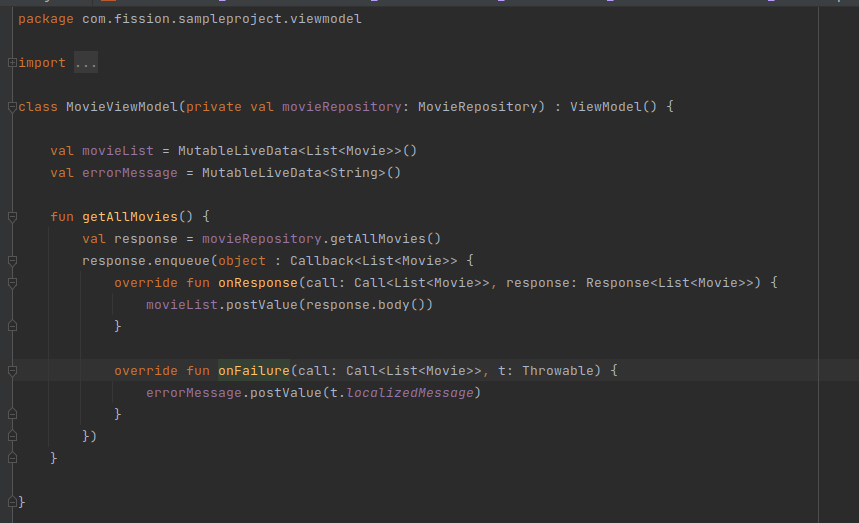
Setup the ViewModel: In the ViewModel setup, We need to create a class and extend the ViewModel. ViewModel class has business logic and API call implementations. In the ViewModel constructor, we need to pass the data repository to handle the data.
-
Live Data: Since LiveData respects Android Lifecycle, this means it will not invoke its observer callback unless activity or fragment is received onStart() but did not accept onStop() Adding to this, LiveData will also automatically remove the observer when its host receives onDestroy().
-
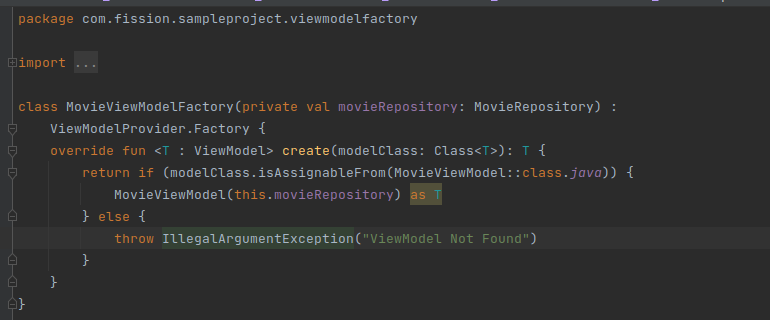
ViewModel Factory: We can not create ViewModel on our own. We need the ViewModelProviders utility provided by Android to create ViewModels.
-
But ViewModelProviders can only instantiate ViewModels with the no-arg constructor.
-
So if I have a ViewModel with multiple arguments, then I need to use a Factory that I can pass to ViewModelProviders to use when an instance of MyViewModel is required.
-
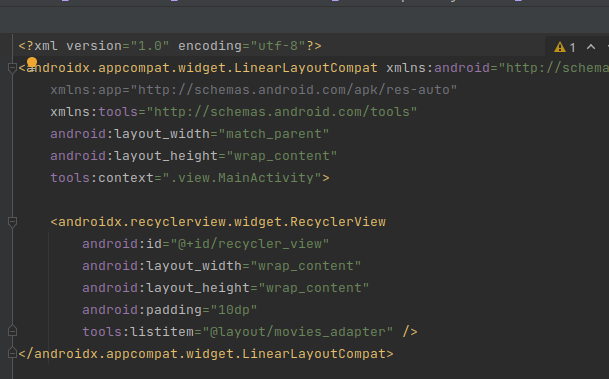
Setting up the UI: In the UI part, We need to create an instance of the ViewModel and observe the API response. Based on the API response we need to update the UI. First, we need to set up the recycler view in our MainActivity. Create a recycler view in our main XML file.
-
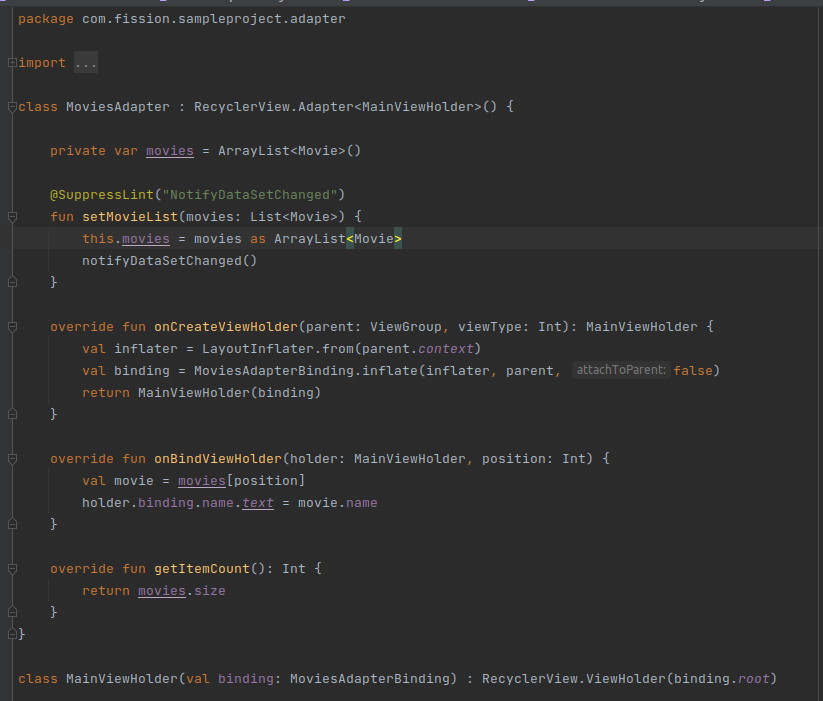
Also, create an adapter for the recycler view to set all the items into the recycler view.
-
item layout for the adapter movies_adapter.xml:

-
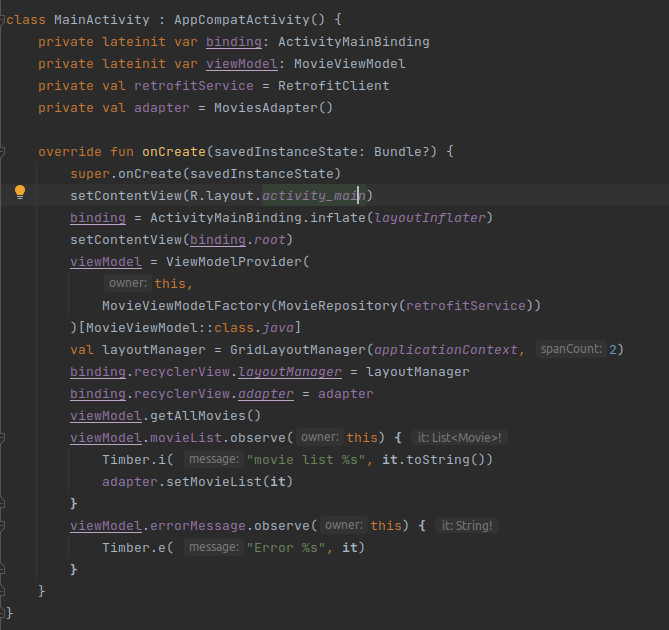
Once, all the recycler view setup is completed. we need to create a ViewModel instance and call the API.
val viewModel = ViewModelProvider(this, MyViewModelFactory(MainRepository(retrofitService))).get(MainViewModel::class.java)viewModel.getAllMovies() -
Finally, we need to observe the response from the API and update the UI.
DATABASE INTEGRATION: Here I have used the Room database.
- The room persistence library is an abstraction layer over SQLite.
- The room is an ORM ( Object Relational Mapper ) for SQLite database in Android. It is part of the Architecture Components.
- The room makes using SQLite much easier for you by implementing annotations.
There are 3 main components are there in the Room database.
- Database
- Dao
- Entity
STEPS:
- Create a new project in Android(As I have created already a project above using the same project).
- Add dependencies in build.gradle file(App level)
plugins {
id 'kotlin-kapt'
}
implementation "androidx.room:room-runtime:2.5.0"
kapt "androidx.room:room-compiler:2.5.0"
implementation "androidx.room:room-ktx:2.5.0"
-
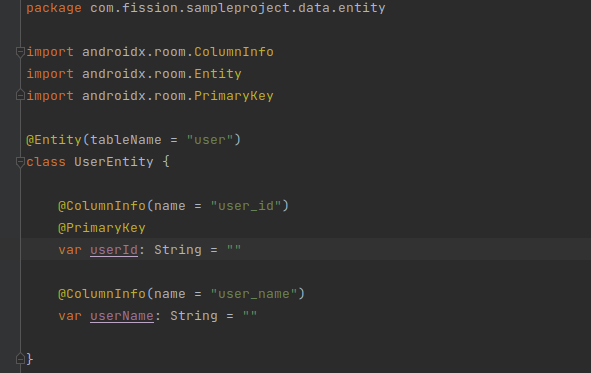
Now let’s create an Entity: It must declare one field as a primary key. You need to annotate a field with PrimaryKey with the attribute autoGenerate by default it is false. The class is annotated with Entity and the name of the table.
-
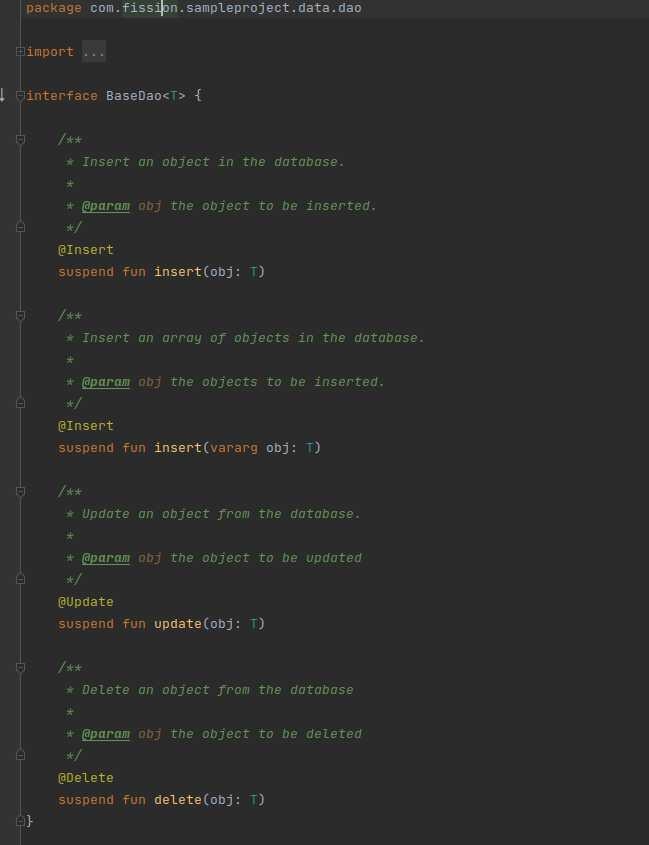
Create a Dao ( Data access object ) using an interface.
- This class is annotated with Dao annotation
- There are four annotations Query, Insert, Update, Delete to perform CRUD operations.
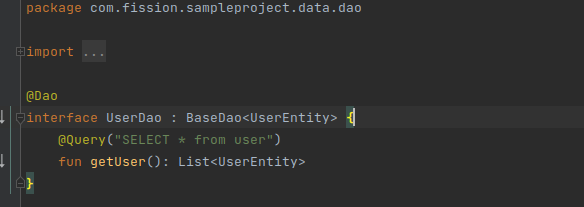
- Here I have created a common interface for CRUD operations which can be extended by any other Dao classes.
- I have created a separate Dao class that extends the base Dao class.
-
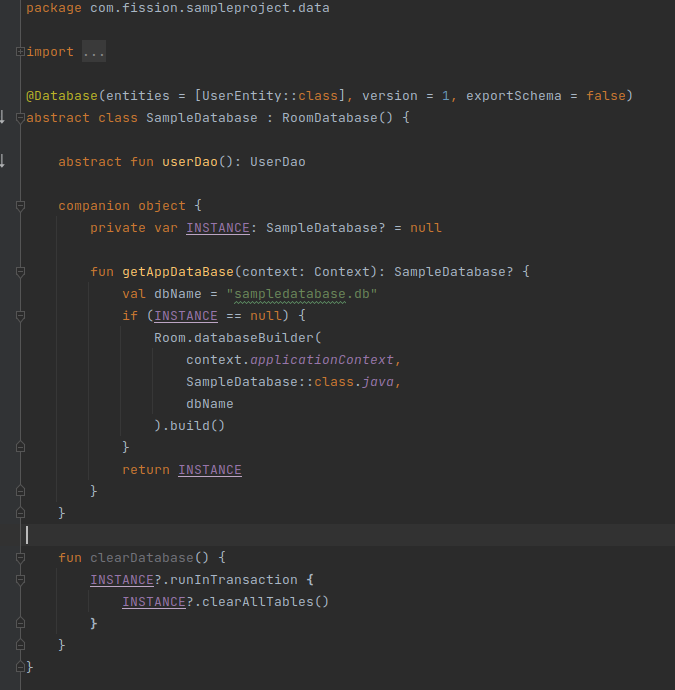
Create a database class that extends RoomDatabase.
UNIT TESTING USING MOCKITO:
Here I have integrated Mockito for unit testing. STEPS:
- Add dependencies
testImplementation 'org.mockito:mockito-core:2.25.0'
testImplementation 'org.mockito:mockito-inline:2.13.0'
-
Here I have created a TextUtils class for which I have added a unit test case. I have done basic unit testing.
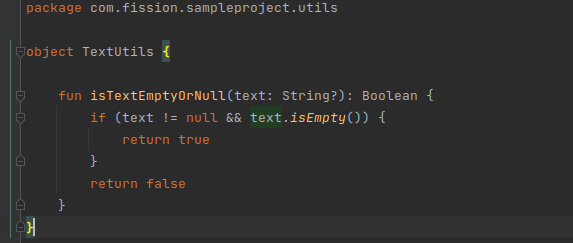
-
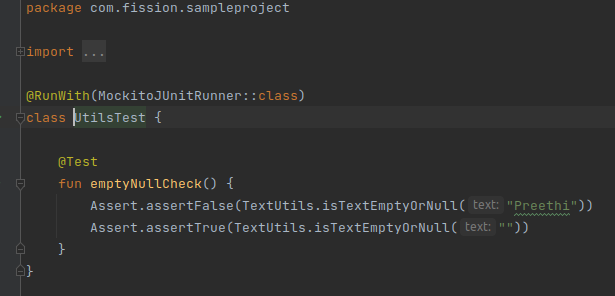
Below is the unit test class which I have created under the test package.
TIMBER FOR LOGGING: Here I have integrated timber for logging.
STEPS:
- Add Dependency
implementation "com.jakewharton.timber:timber:4.7.1"
-
Initialize timber in MainApp
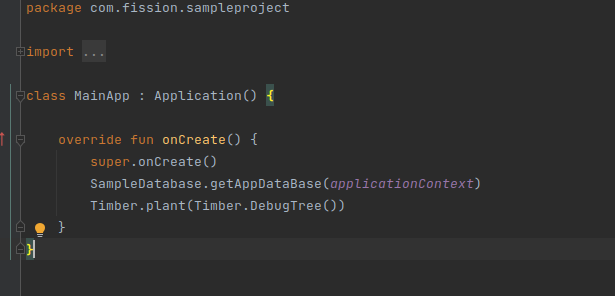
-
Use Timber for Logging:
Timber.i( "movie list %s", it.toString())
LINT TOOL: A static code scanning tool that you can run on your Android project either from the command line or in Android Studio. The lint tool checks for structural code problems that could affect the quality and performance of your Android app.
-
Run lint from the command line (For Linux)
./gradlew lint -
For Windows:
gradlew lint -
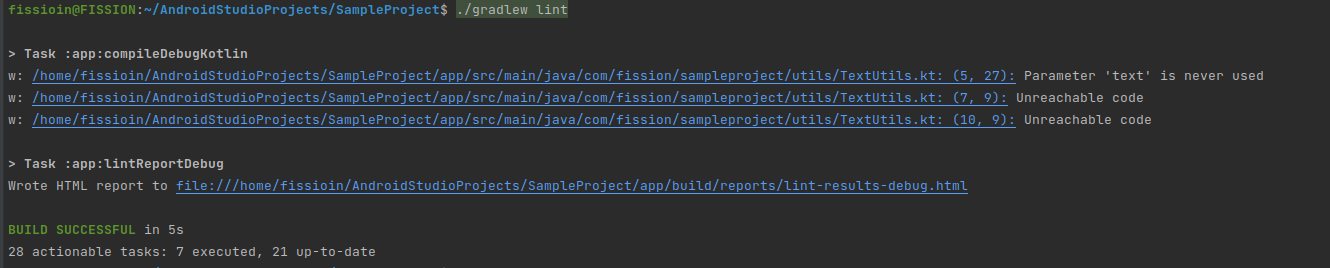
You should see output similar to the following:

-
We can see the lint results in HTML file displayed in the above results.
-
To perform lint on debug and release build variants separately below commands can be used.
For Release:
./gradlew lintRelease
For Debug: ./gradlew lintDebug
Sample Error for lint:
- Added an unused string in MainActivity.kt file
- Added return statement for isTextEmptyOrNull function in TextUtils.kt file
Below errors are displayed when we run the lint in the console.
SONARQUBE:
SonarQube is an open-source framework developed by SonarSource. SonarQube is available for free under the GNU Lesser General Public License. It offers reports on duplicated code, code coverage, code complexity, coding standards, comments, unit tests, bugs, and security recommendations. SonarQube includes support for the 20 programming languages such as Java, Swift, Python, Kotlin JavaScript, C, C++, C#, TypeScript, and Go.
STEPS:
-
Download the latest version of the Sonarqube community edition https://www.sonarsource.com/products/sonarqube/downloads/
-
We must have JDK 11 or 17 installed in the system.
-
To verify the java version use the command “java –version”

-
Extract the downloaded Sonarqube zip file
-
To run the Sonarqube server go to the bin folder and select the operating system on which you want to run

-
After selecting open terminal from the specified location(Here I am using ubuntu OS). To start the sonar server using below command

-
To verify Sonarqube is up and running. Go to your browser and type http://localhost:9000/
-
Once it is up and running, For the very first time it will ask for a username and password. Username: admin, password: admin.
-
After entering the username and password, It will ask to update the password.
-
It will navigate to the home page.
-
To Integrate with the Android app. First, we need to create a project in Android studio.
-
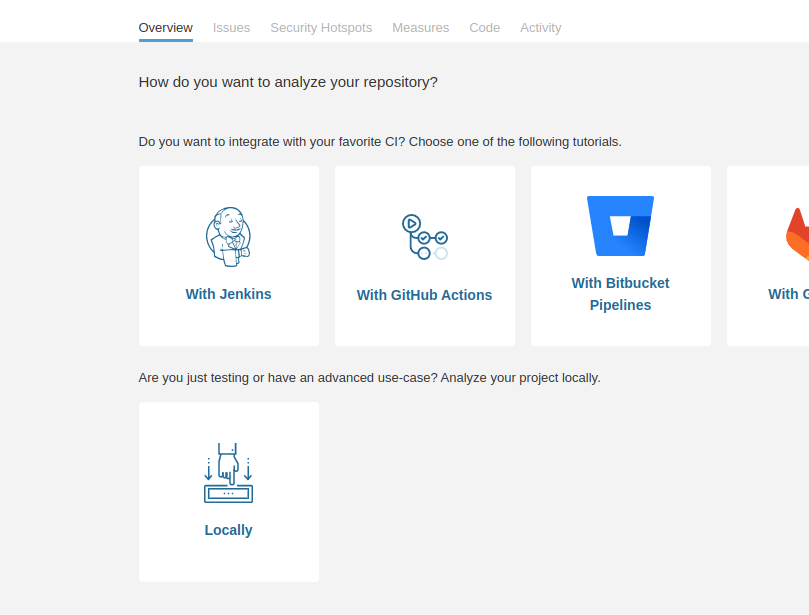
Now In the localhost Sonarqube, create a project Manually. Enter the Project name, Project key(Save the details as they will be used in the Android project).

-
After providing the details, select “locally”.
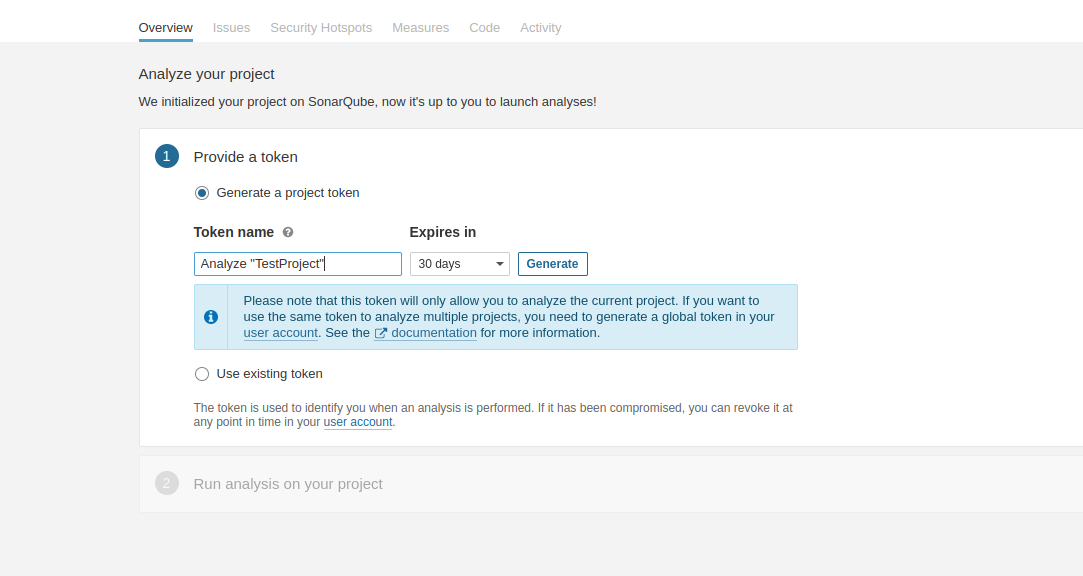
-
Generate the token and save it. It is used to run the Sonarqube in the project.
-
After generating the token, Select “Gradle” as we are integrating into the Android project. Then add the dependencies provided in the Android project.
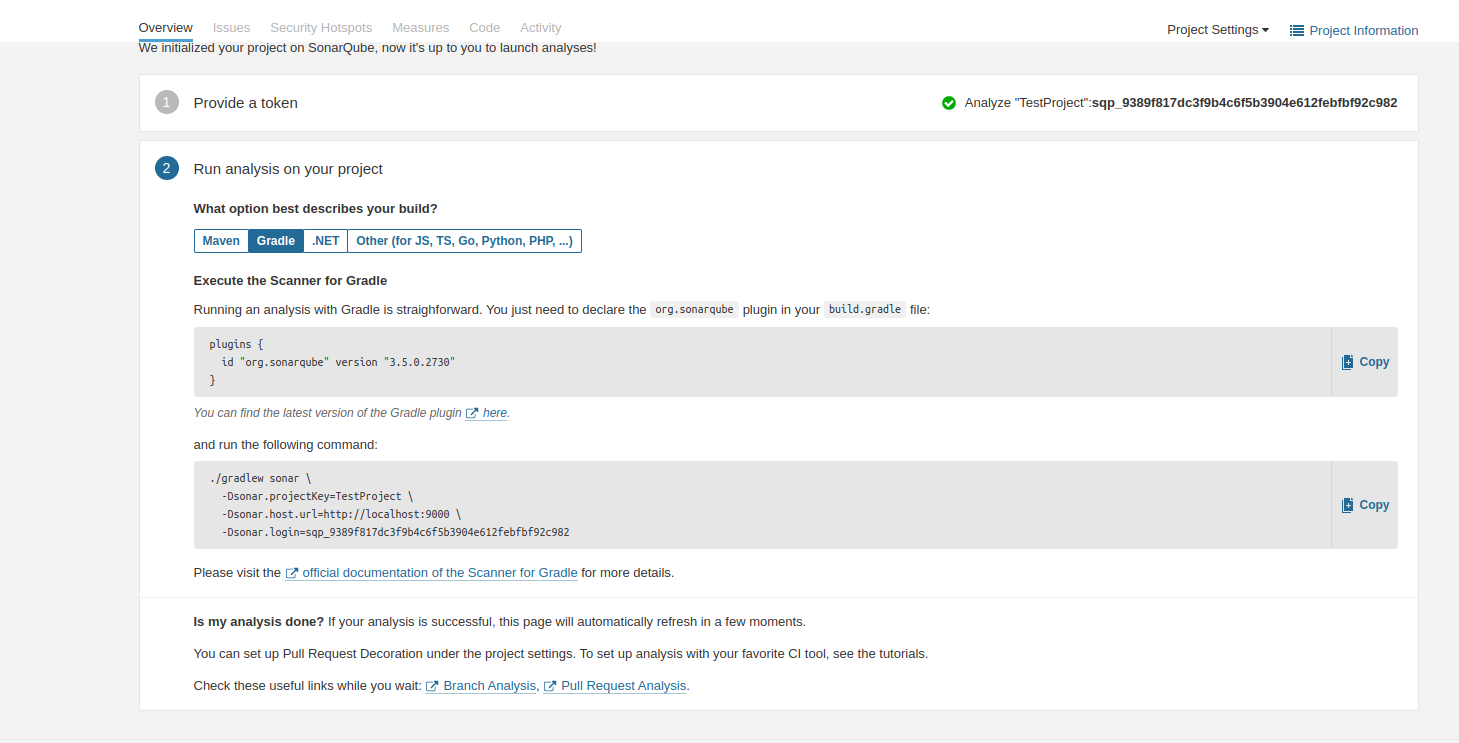
-
Add the plugin and Sonarqube properties(in the android section) in the App level build.gradle file
plugins {
id 'org.sonarqube'
}
sonarqube {
properties {
property "sonar.projectName", "AndroidTest"
property "sonar.projectKey", "AndroidTest"
property "sonar.language", "kotlin"
property "sonar.host.url", "http://localhost:9000"
}
}
-
Run the Sonarqube in terminal using the command provided After generating the token: For Ex:
./gradlew sonar -Dsonar.projectKey=SampleSonarProject-1 -Dsonar.host.url=http://localhost:9000 -Dsonar.login=sqp_c6305826a010c7d1b60855e2765ca80a54ac9 -
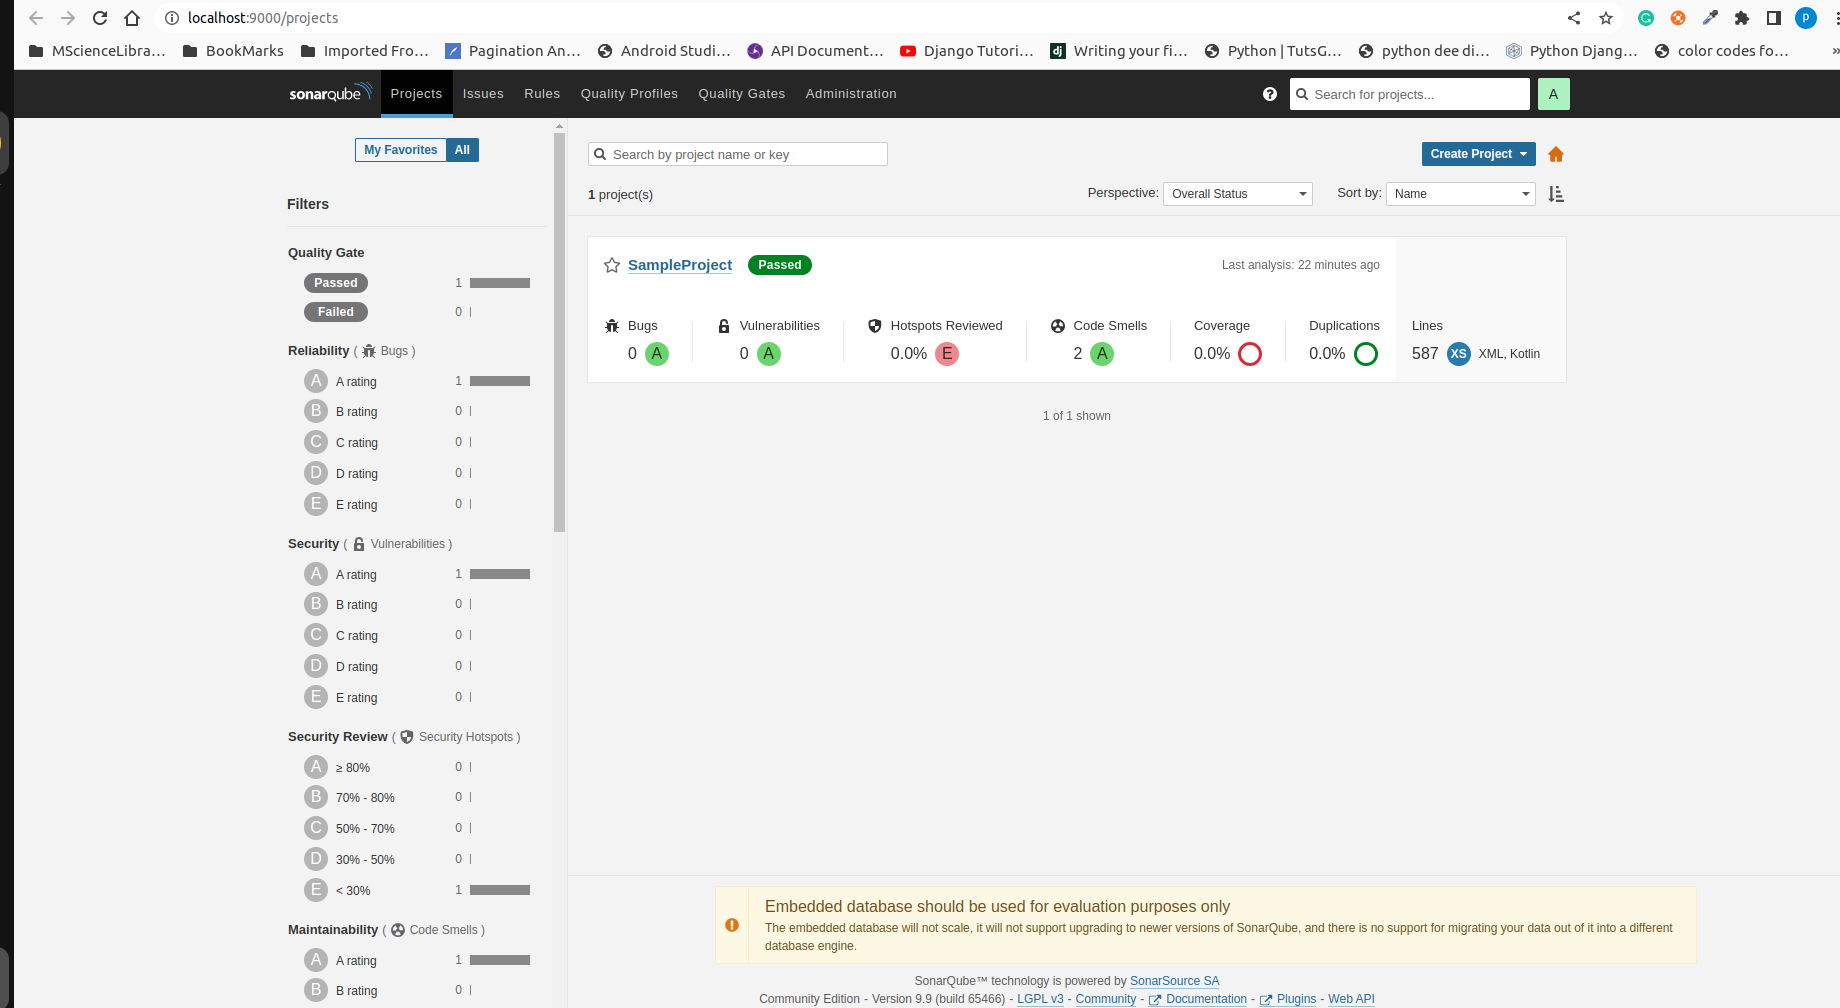
Now Open the browser http://localhost:9000/. Select your project. You can the results below.
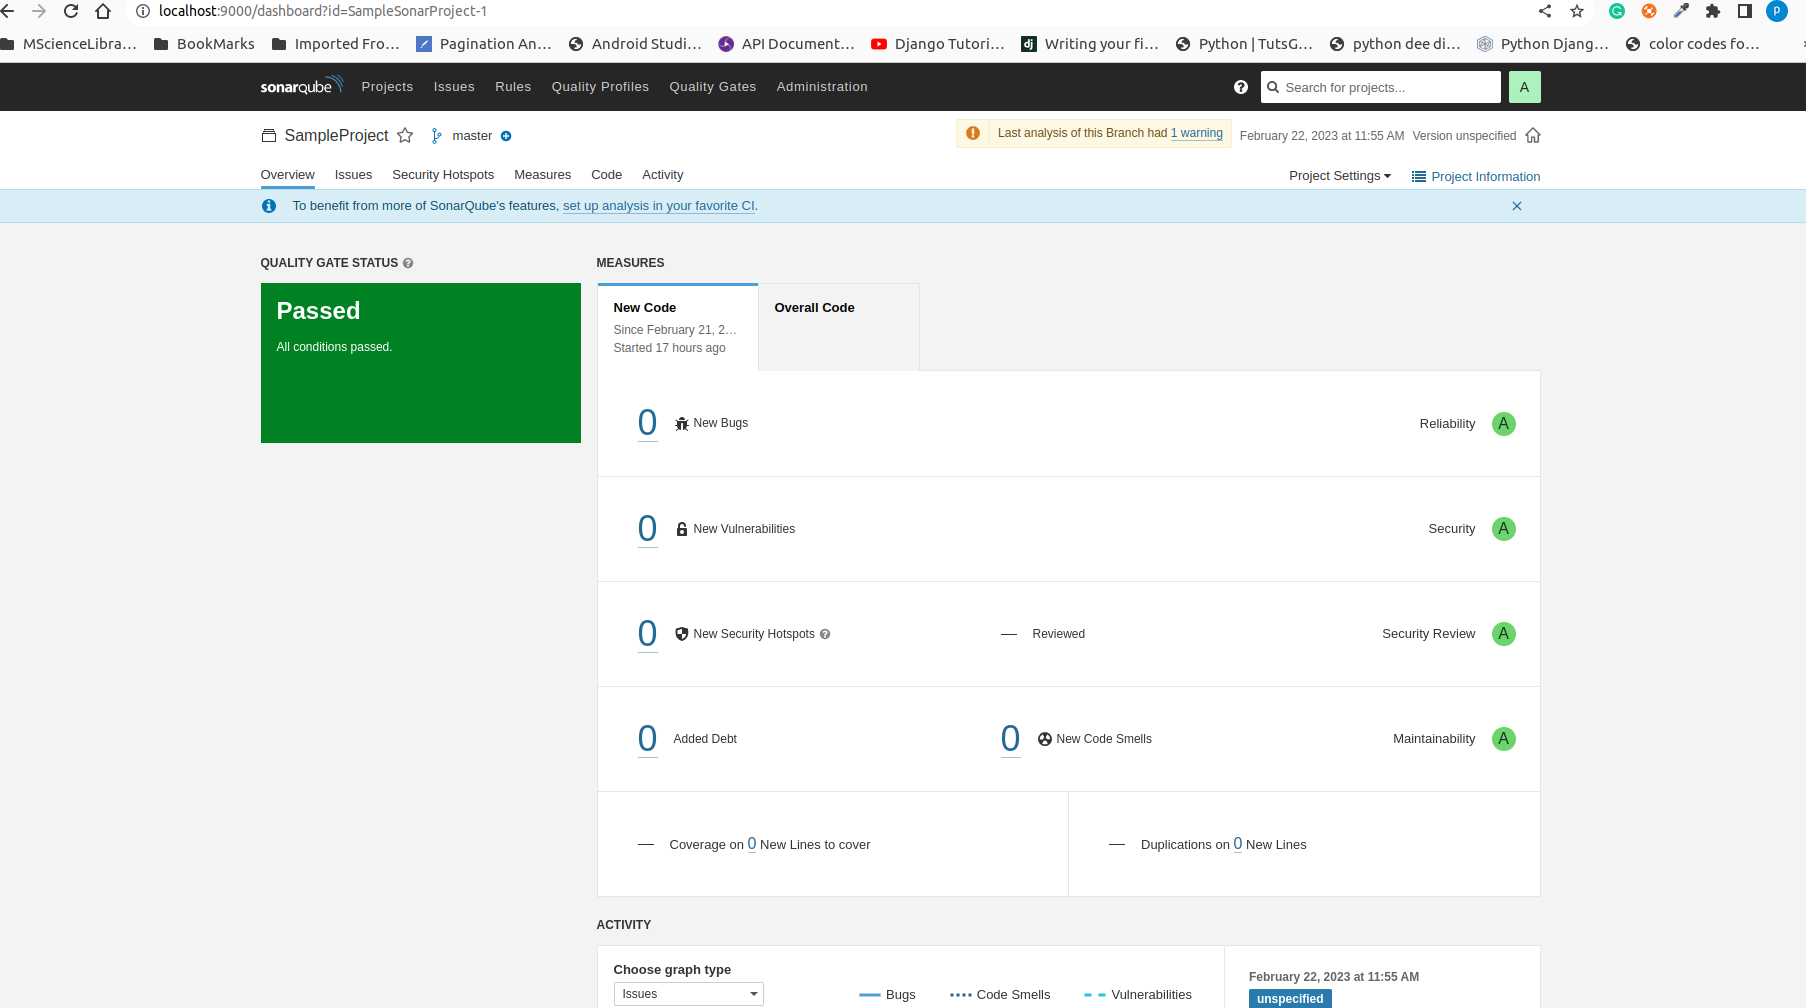
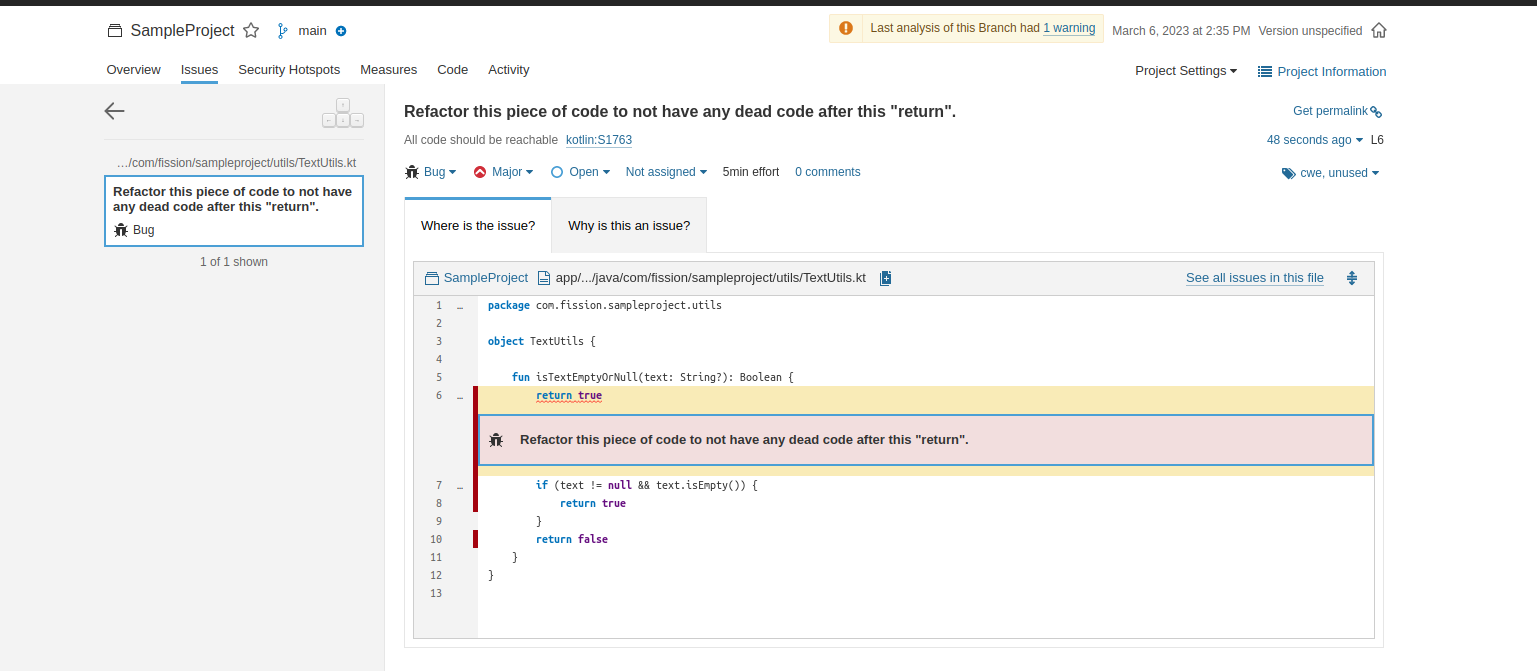
Sample Error for SonarQube:
- Added return statement for isTextEmptyOrNull function in TextUtils.kt file.
Below error is shown in Sonarqube when we run the Sonarqube:
Use properties file:
- Create a properties file in the assets folder
- Create a method to get the property value below
- Here We have created a file with the name "config.properties" under the assets folder.
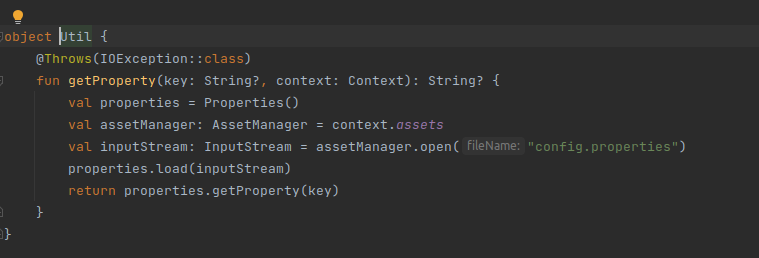
- We can get the value of any property by using the following code
Util.getProperty({Key}, applicationContext)