-
Notifications
You must be signed in to change notification settings - Fork 38
Section 1: Setup
Garth Braithwaite edited this page Apr 30, 2013
·
8 revisions
Get up and running with Git, Node, and Grunt.
#0 Create a GitHub Account Go to GitHub and setup an account if you don't already have one.
#1.1 Install the GitHub Client Download (mac or windows) and install the latest version of the desktop GitHub client.
Use your GitHub username and password.
#1.2 Install Node Follow the instructions for installing nvm
or
Install the regular NodeJS
#1.3 Hardcore forking Go to GarthDB/html_prototyping and fork it.

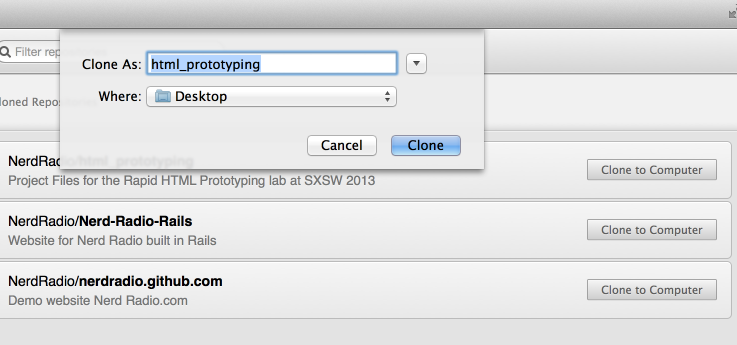
Clone your repo locally

Select the location - desktop

Find the newly cloned repository

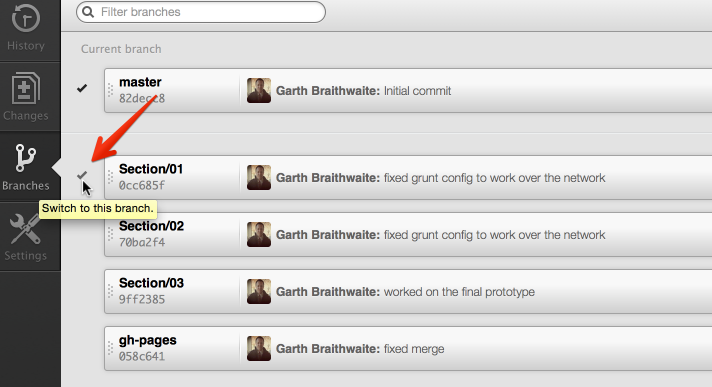
Switch to the Section/01 branch.

#1.4 Install Grunt CLI ##For Windows
- Open the Nodejs Command Prompt (not the command prompt, or the Nodejs application)
- Navigate to the folder where we downloaded the repo
cd Desktop\html_prototyping - Run the folling command:
npm install -g grunt-cli
##For OS X
- In Terminal, navigate to the html_prototyping directory.
cd ~/Desktop/html_prototyping - Type in the following command:
npm install -g grunt-cli
(troubleshoot) If your computer complains about permissions, run the command as sudo:
sudo npm install -g grunt-cli
#1.5 Start the starter
- Make sure you're still in the html_prototyping folder
- Type in the following command (This will download and install the necessary dependecies):
npm install - Startup the grunt watcher and reload
grunt
Enjoy.