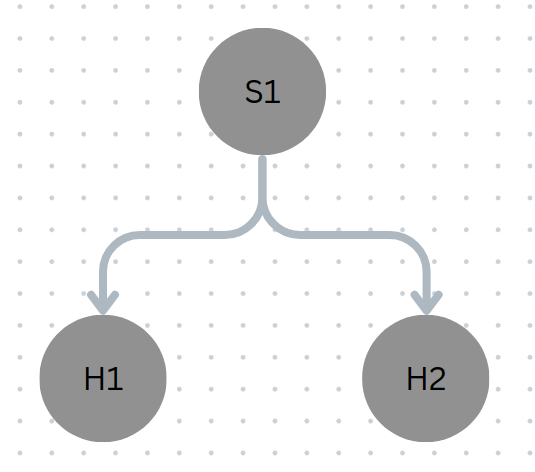
In this tutorial, we will create a basic topology consisting of 2 hosts and a switch just like in the previous tutorials. To do this we will be using mininet. For mininet documentation go here.
The code below imports several modules from the Mininet library that can be used to create and manage a Mininet network topology. The Mininet module provides the main class for creating and managing the network, the CLI module provides a class for launching the Mininet CLI, the setLogLevel and info modules provide logging functions for logging messages, and the OVSController module provides a class for creating an Open vSwitch controller for managing OVS switches in the network.
from mininet.net import Mininet
from mininet.cli import CLI
from mininet.log import setLogLevel, info
from mininet.node import OVSController
def emptyNet():
This line of code creates a new Mininet object named net with the Mininet class and specifies that an Open vSwitch (OVS) controller should be used as the default controller for the network by setting the controller parameter to OVSController. The waitConnected parameter is set to True, which means that the Mininet object will wait for all switches to be connected to the controller before starting the network.
net = Mininet( controller=OVSController, waitConnected=True )
Below lines of code add a controller to the Mininet network topology. The second line uses the addController function of the net object to add a new controller with the name 'c0'.
In Mininet, the controller is responsible for managing the network switches and forwarding packets between hosts.
info( '*** Adding controller\n' )
net.addController( 'c0' )
Note: The first line uses the info function to log a message to the console indicating that a controller is being added to the network.
Below code add two hosts to the Mininet network topology. The addHost function of the net object is used to create the hosts and assign IP addresses to them. The first argument to the addHost function is the name of the host, which in this case is 'h1' and 'h2' respectively. The ip parameter is used to specify the IP address of the host.
In Mininet, hosts are end devices that can send and receive network traffic
info( '*** Adding hosts\n' )
h1 = net.addHost( 'h1', ip='10.0.0.1' )
h2 = net.addHost( 'h2', ip='10.0.0.2' )
Below code adds a switch to the Mininet network topology. The addSwitch function of the net object is used to create the switch with the name 's3'.
In Mininet, switches are networking devices that connect hosts or switches together and forward packets between them.
info( '*** Adding switch\n' )
s3 = net.addSwitch( 's3' )
Below code creates links between the hosts and the switch in the Mininet network topology. The addLink function of the net object is used to create the links.
In Mininet, links connect hosts to switches and switches to other switches to form a network topology.
info( '*** Creating links\n' )
net.addLink( h1, s3 )
net.addLink( h2, s3 )
Below code start the Mininet network, open the Mininet command-line interface (CLI), and stop the network when it's done.
info( '*** Starting network\n')
net.start()

info( '*** Running CLI\n' )
CLI( net )

info( '*** Stopping network' )
net.stop()
Here the emptyNet function is called, which creates and runs the Mininet network topology. Once the simulation is complete, the script exits.
if __name__ == '__main__':
    setLogLevel( 'info' )
    emptyNet()
Note: setLogLevel function here is called with the argument 'info', which sets the logging level to 'info'. This means that log messages with severity level 'info' and higher (such as 'warning' and 'error') will be printed to the console.
sudo python emptynet.py
Mininet provides a CLI (Command Line Interface) that can be used to interact with the network topology. Here are some basic commands that you can use:
nodes- Lists all the nodes in the network.links- Lists all the links in the network.net- Shows the network configuration.pingall- Tests connectivity between all hosts in the network.<host> <any command inside host>- Execute any command inside host.<source_host> ping <destination_host>- Tests connectivity between the host running the command and the specified destination host.dump- Dumps the state of all the switches and hosts in the network.exit- Exits the Mininet CLI.
These are just a few of the many commands that are available in Mininet. You can find more detailed information about these commands and other Mininet commands in the Mininet documentation.
For this part of the tutorial lets play around with the network latency.
Import TCLink. The TCLink class is a subclass of the Link class in Mininet. It is used to create links between nodes in a Mininet network with specified bandwidth, delay, loss, and other characteristics. The TCLink class uses the Linux Traffic Control (tc) command to configure the characteristics of the link.
from mininet.link import TCLink
Modify the previously written code to specify delay when adding link.
net.addLink( h1, s3, cls=TCLink, delay='50ms' )
sudo python emptynet.py
Check latency by executing the following command in mininet CLI.
h1 ping h2
There should be a delay of more than 100 ms. Why 100ms?
The example for this tutorial has been taken from here with some minor changes. Apart from that this is a great resource that demonstrates different mininet features.