Downloading and Installing Git (Bash)
Download using following three ways:
- Git's official website
- Separate project on Github called Git for Windows
- Software Package Manager like Chocolatey
Once downloaded, install the git bash:
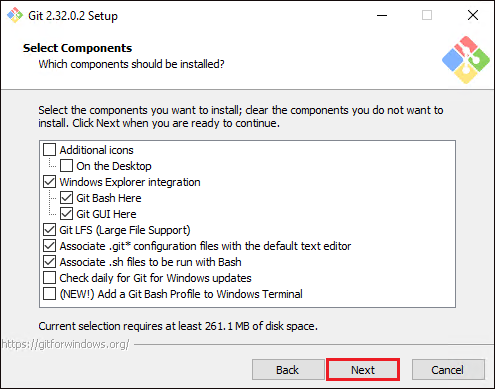
- Launch the installer and click Next through the steps to get Select Components screen.
- Check the boxes you want to include in installation. Leave rest. Click on Next.
- Leave default for creating a shortcut in start menu folder and click Next.
- Select Use Notepad as Git's default editor and click Next.
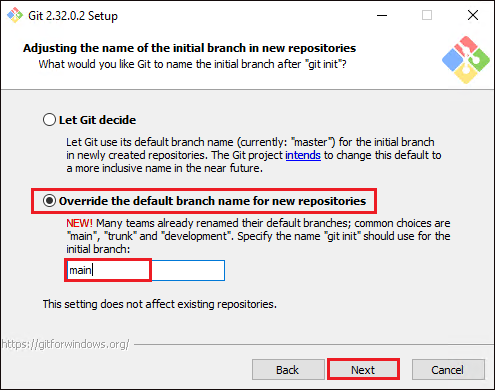
- Select Override the default branch name for new repositories as the default branch name(main). When you initialise the git, the Git will use this branch name by default.
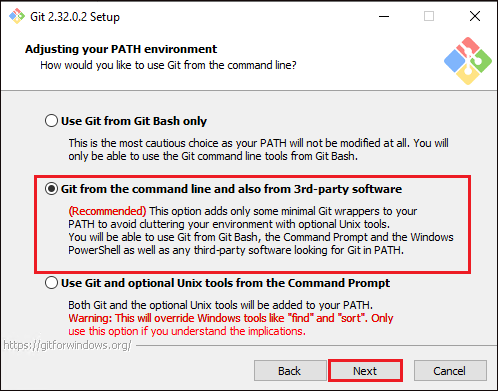
- Now, select Git from the command line and also from 3rd-party software so that Git command can be executed from different tools like Prompt, PowerShell or others.
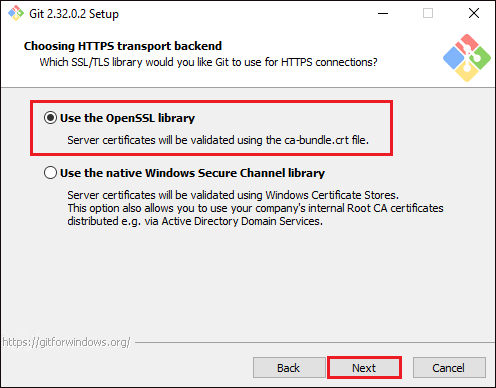
- Click Next. Select Use the OpenSSL library option so that Git validates certificates with OpenSSL, click Next.
If you are using Git in an organisation with enterprise-managed certificates, select User the native Windows Secure Channel library option instead.
- Leave the default Checkout Windows-style, commit Unix-style line endings option and click Next.
- Select Use Mintty(the default terminal of MSYS2) as default terminal emulator to run commands and click Next.
- Select Default (fast-forward or merge) below as git_pull command's default behavior.
- Select Git Credential Manager Core as default Git credential helper and click Next.
- Leave rest s default and click Next. Ensure Enable file system caching option is checked.
- Leave pseudo console and built-in file system monitor options as default and click Install.
- Complete the installation and close the installation wizard by clicking on finish.
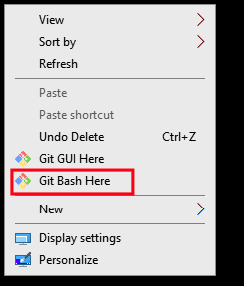
Check if you get the Git Bash Here option on right click on desktop.